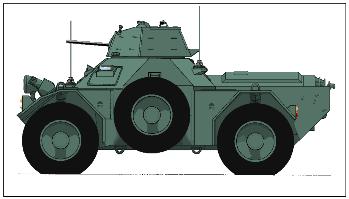
Daimler Ferret Electrical equipment

Last updated on the 16/02/2015 22:08
Wiring Diagrams
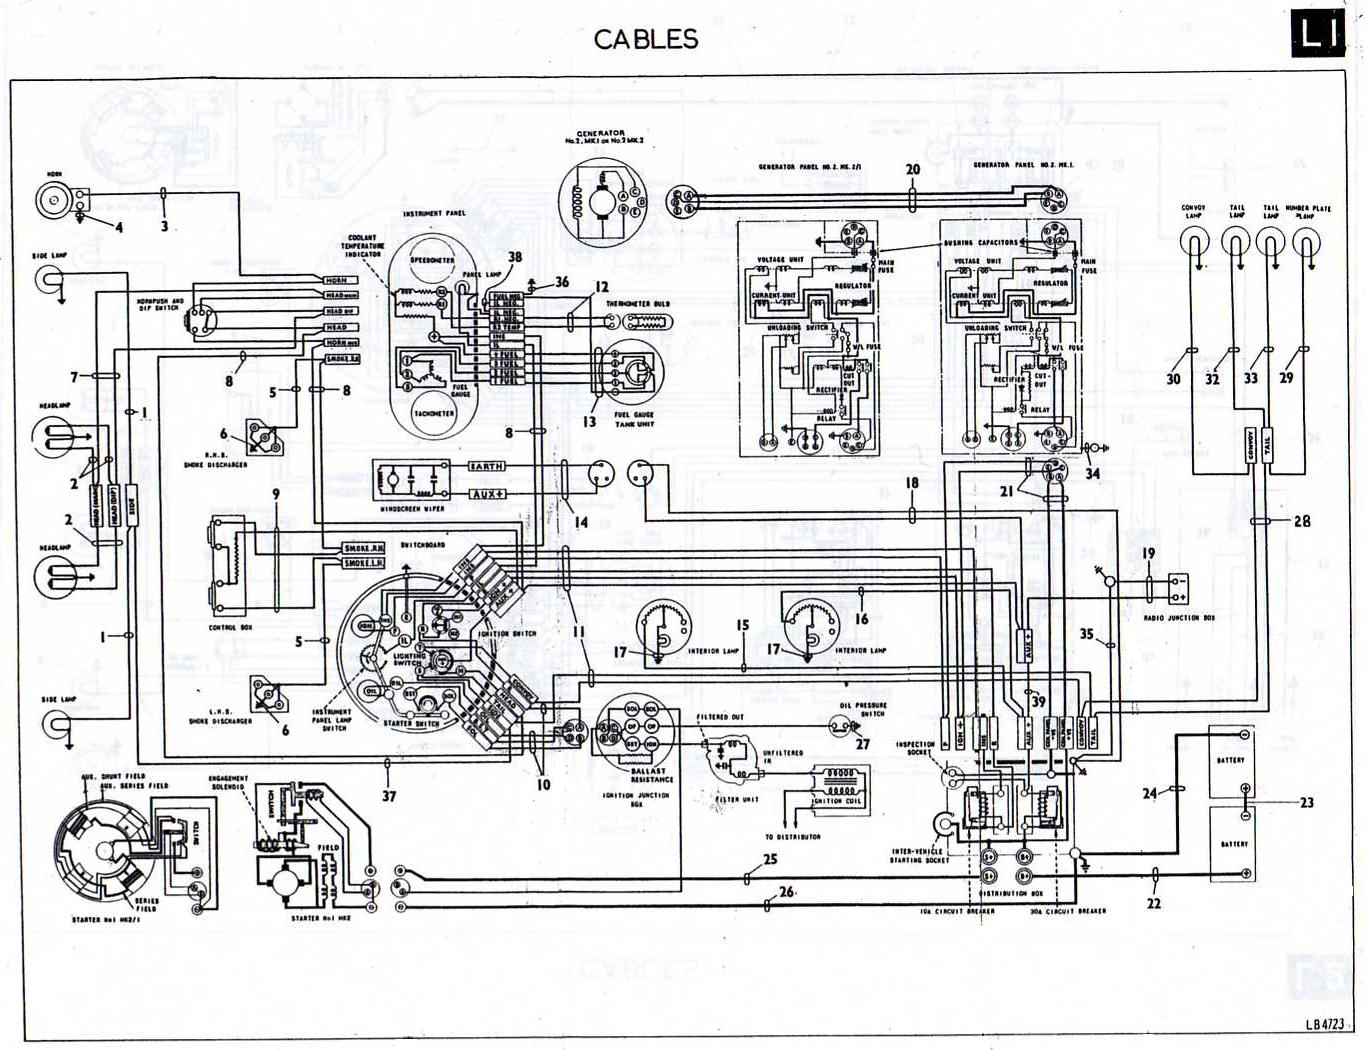
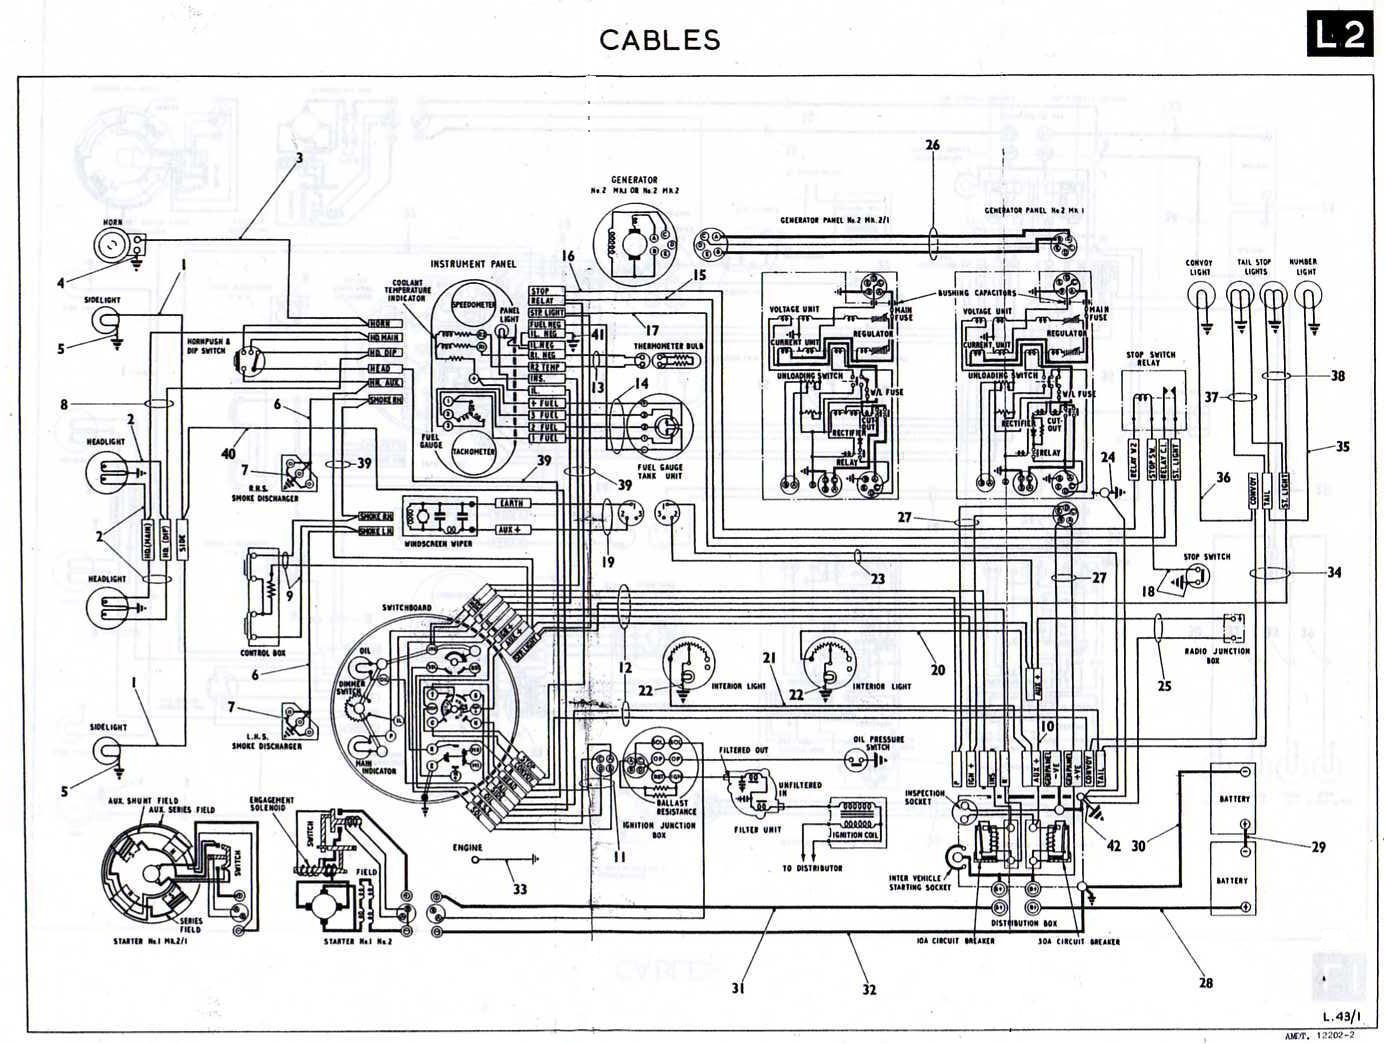
Early Wiring Diagram taken from the 1958 illustrated Spare Parts List no indicators.
Version 1 L1
Version 1 L2
Have a look at the rear lights in the diagram that's just one difference.
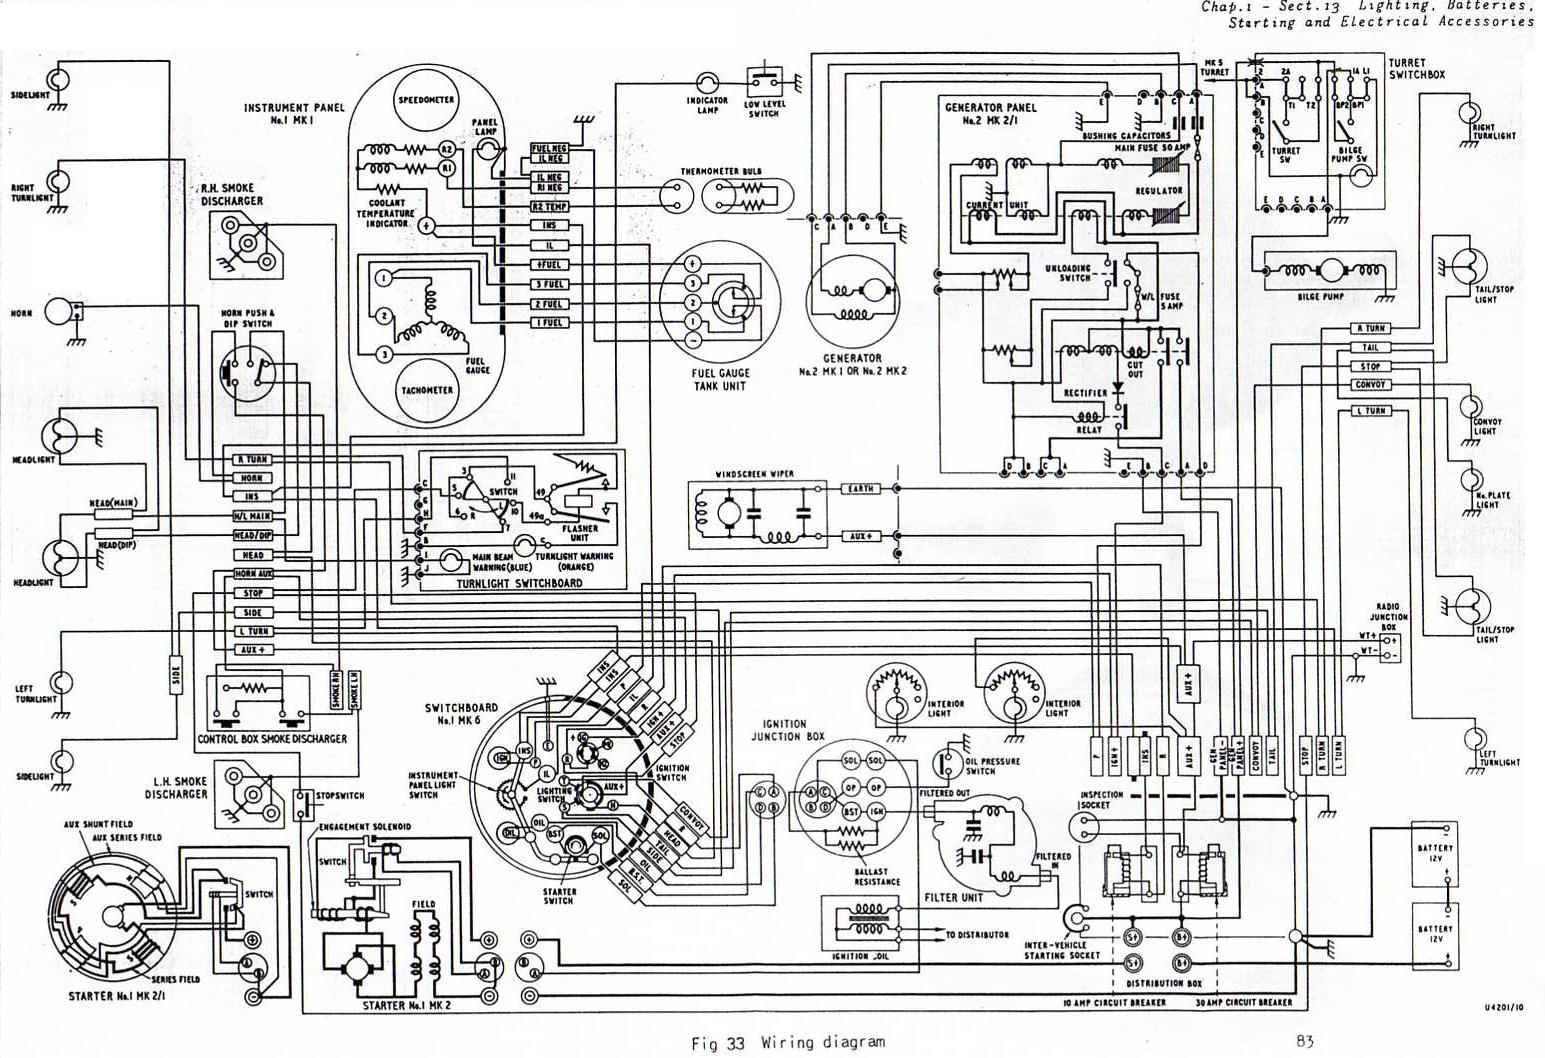
1969 Wiring Diagram
It goes without saying that the wiring diagram has become a lot more complicated due to the fitment of indicators.
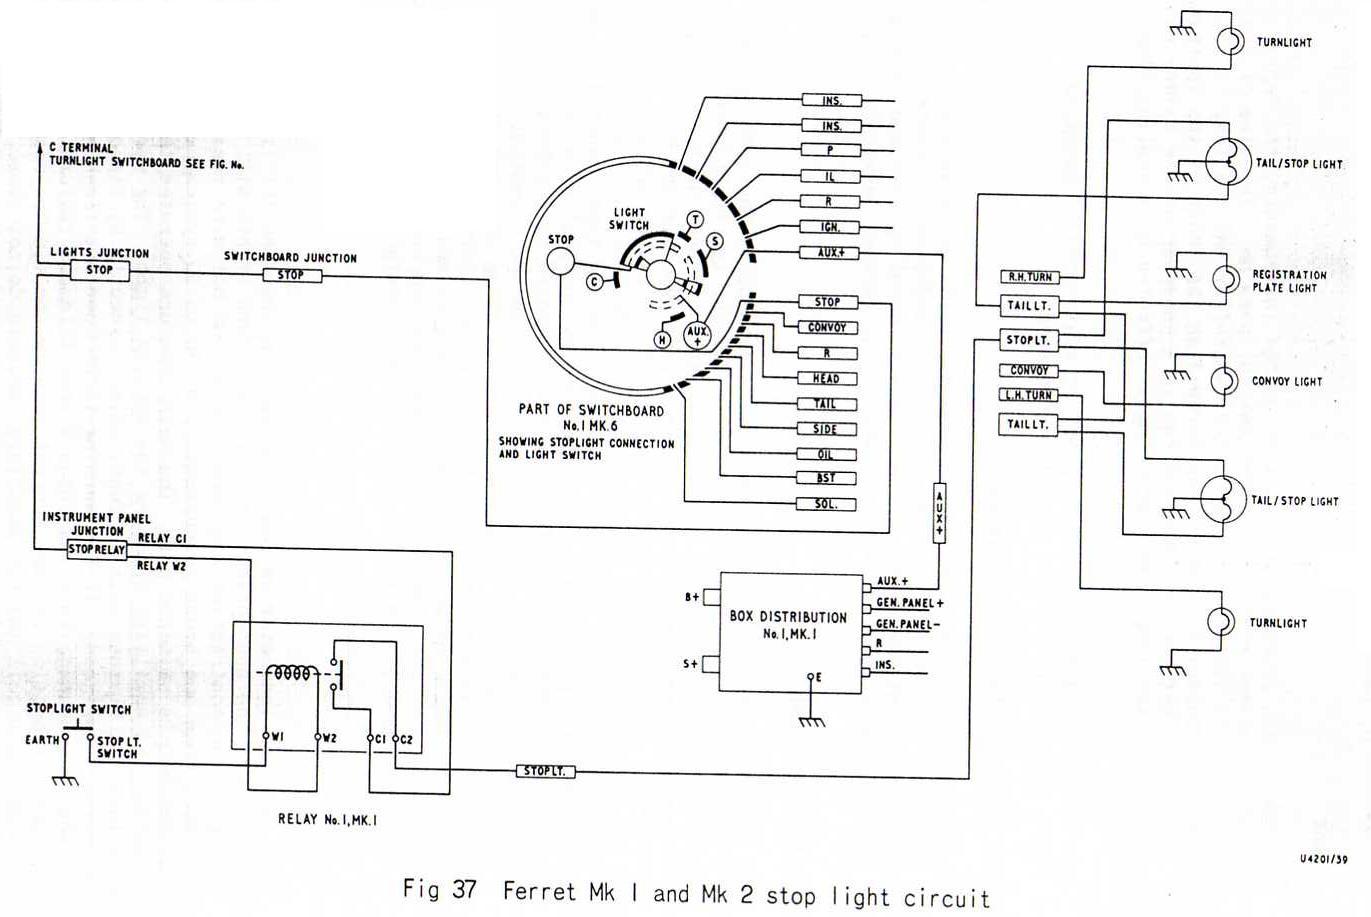
1969 Stop Light Circuit.
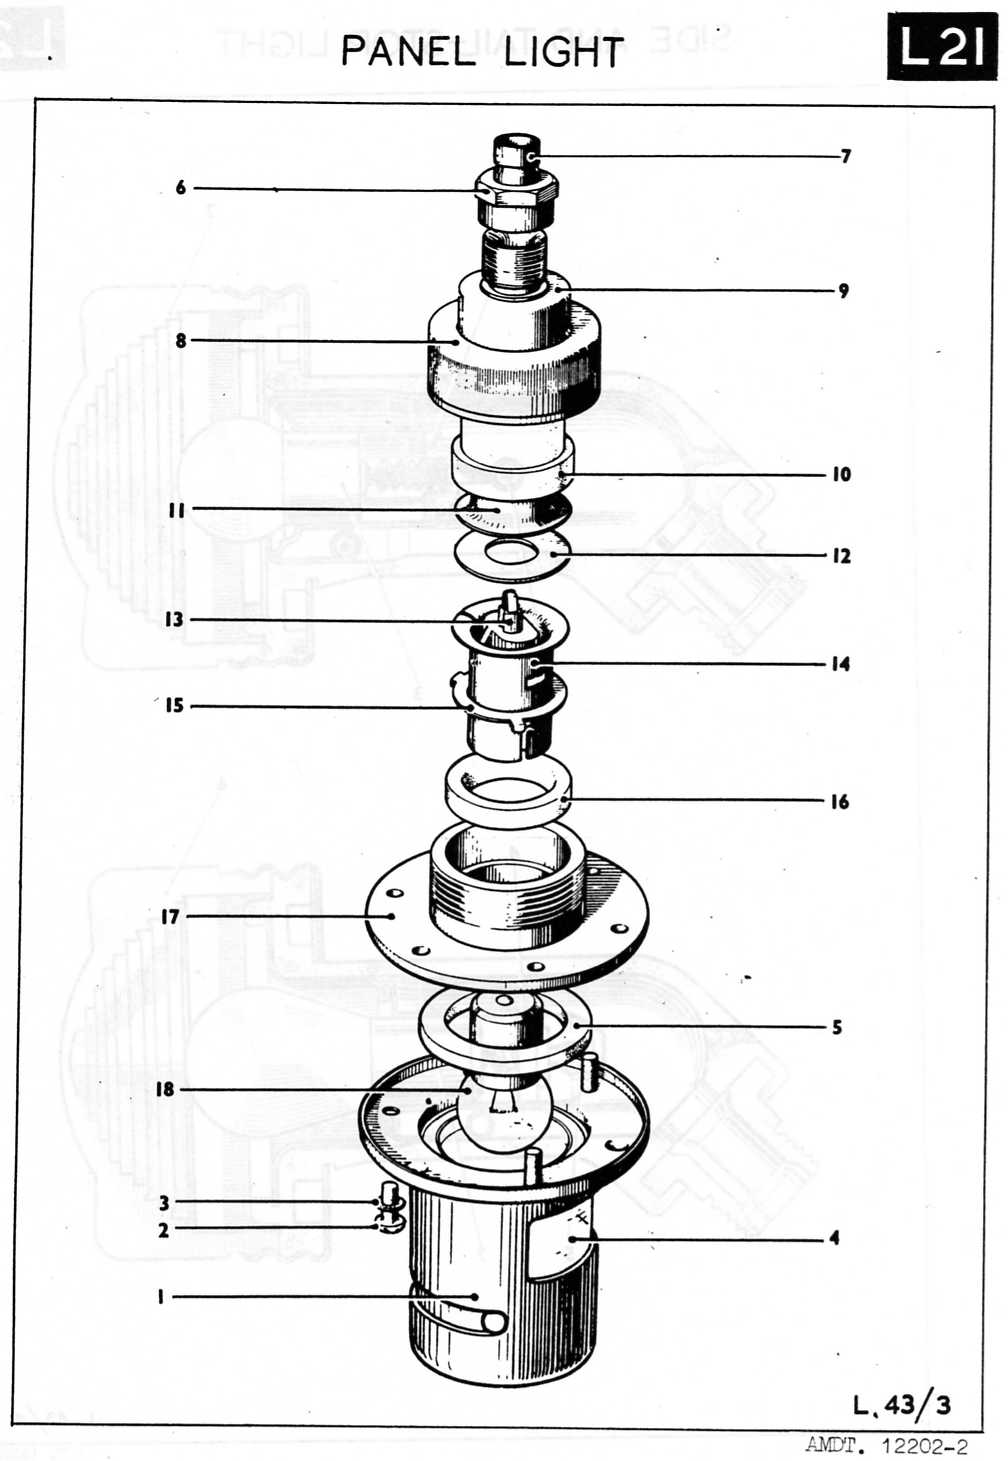
Instruments Cluster
Dash Pod (Temp gauge, Petrol gauge, Speedo clock and Tachometer clock).
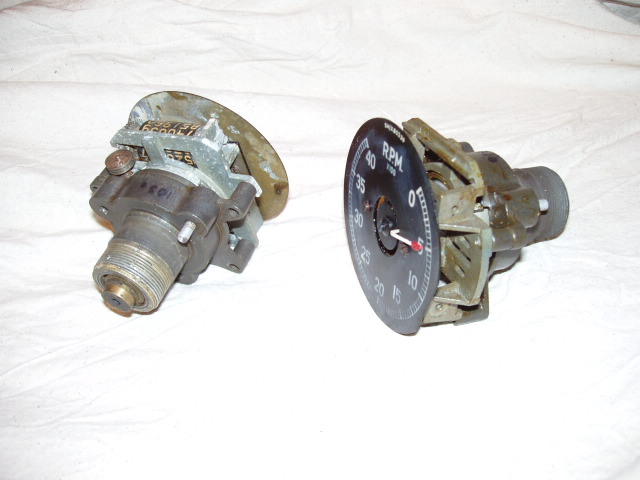

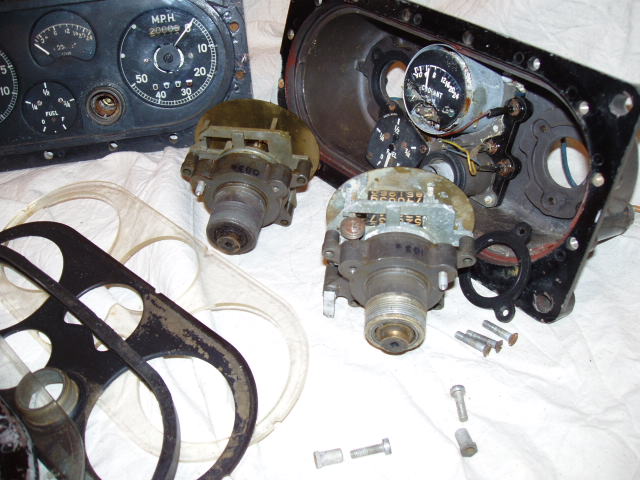
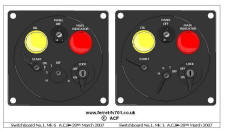
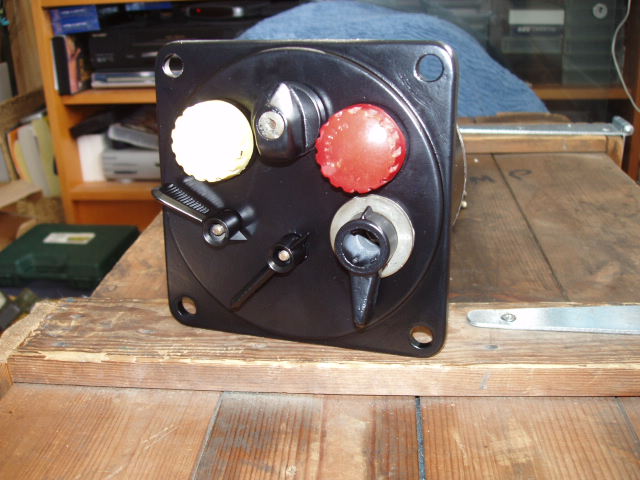
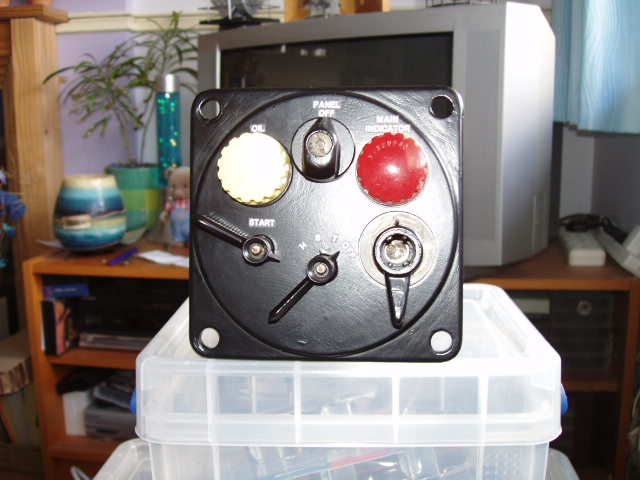
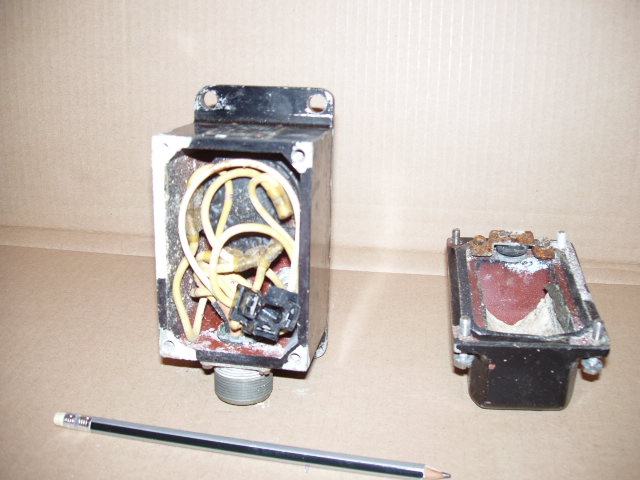
Switchboard
First identify your Switchboard the earlier type of Switchboard is on the right in the picture below.
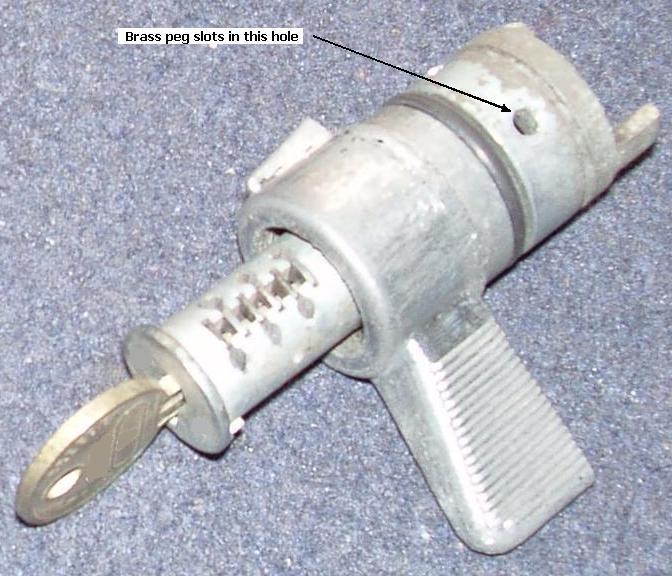
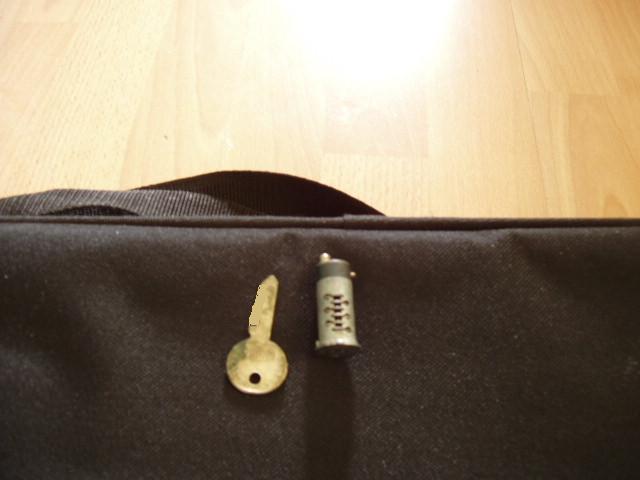
Switchboard No. 1 MK 1 F.V.157924

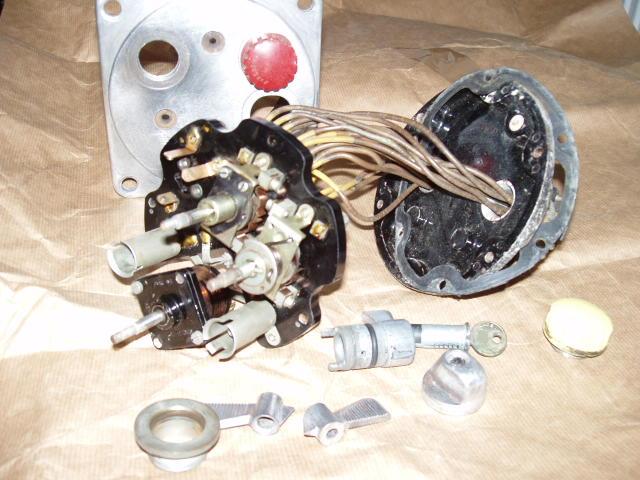

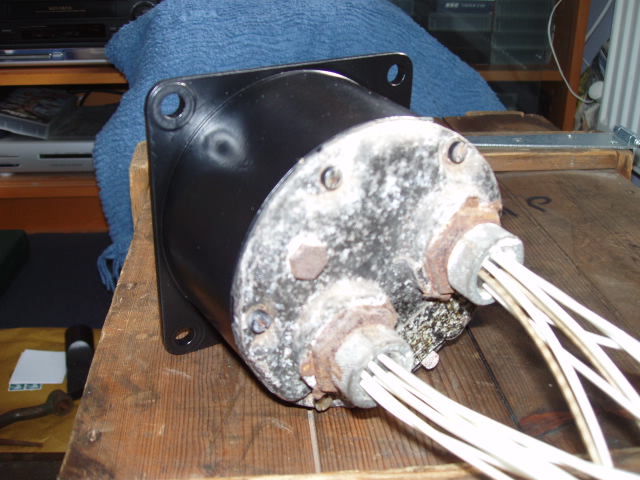
I could not undo the brass ferules that hold the wires at the rear of the unit (see picture above right). Admittedly heat would have worked but I would not have had any rubber left. Having one of those small sand blasting cabinets would have helped at the time (have one now).
Click below for instructions on how to apply new letters to you're Switchboard.
Water slide transfer instructions for the Switchboard
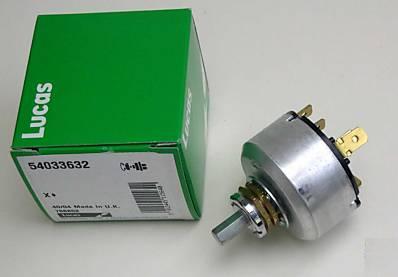
Indicator Box
The unit below is missing it's flasher unit
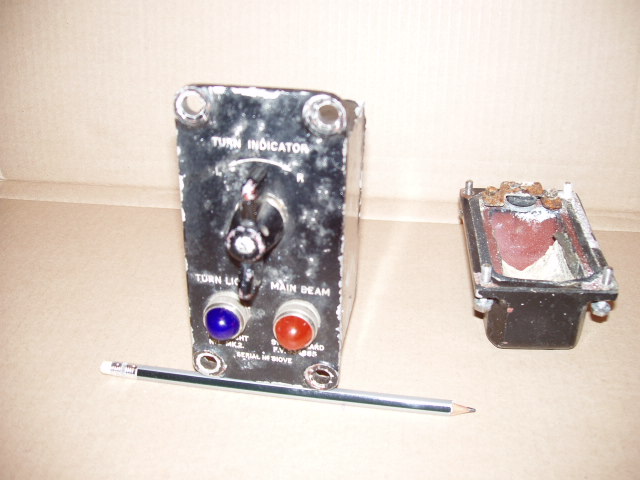

The Lucas switch is still available for the Indicator Box Part No. 54033632 (Triumph Stagg).
Lights
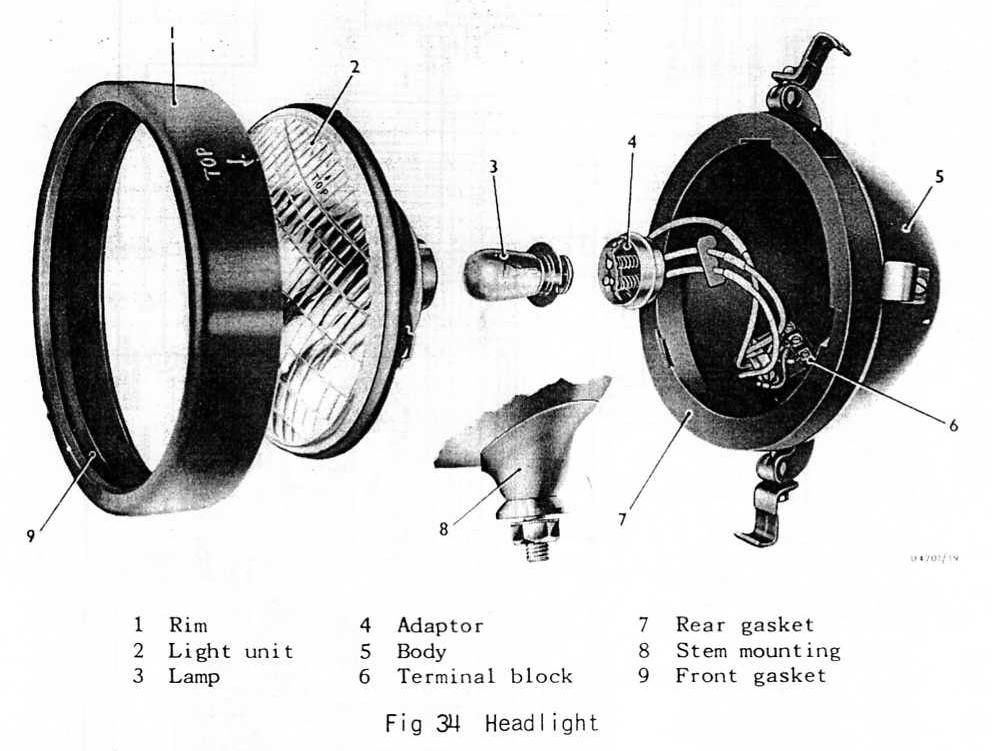
Head Light assembly
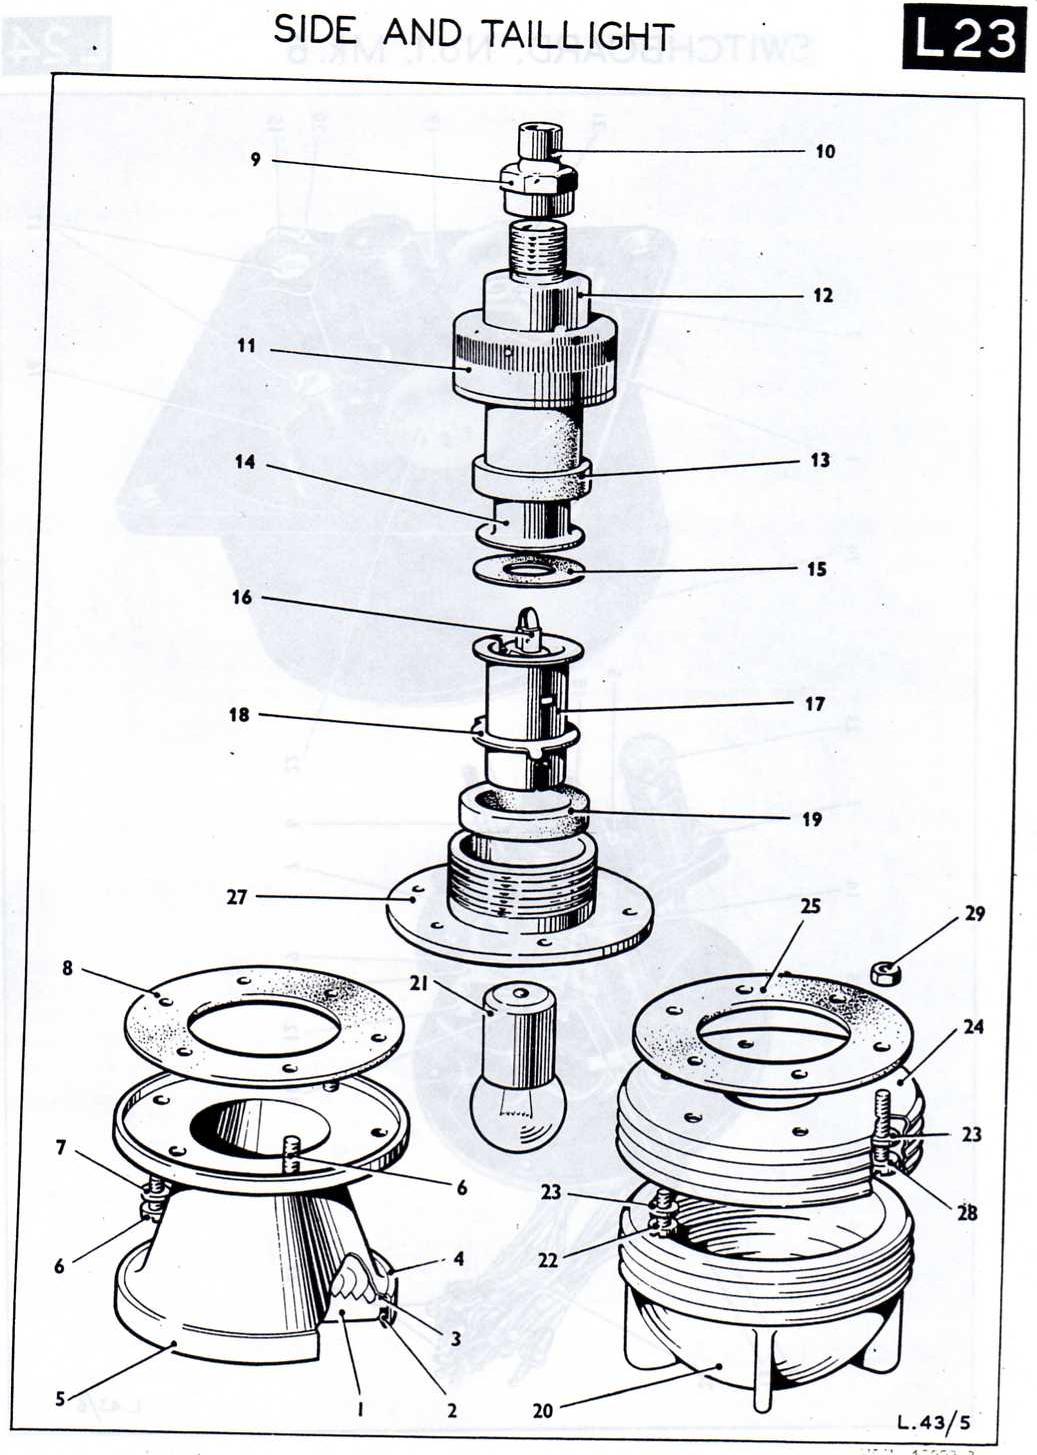
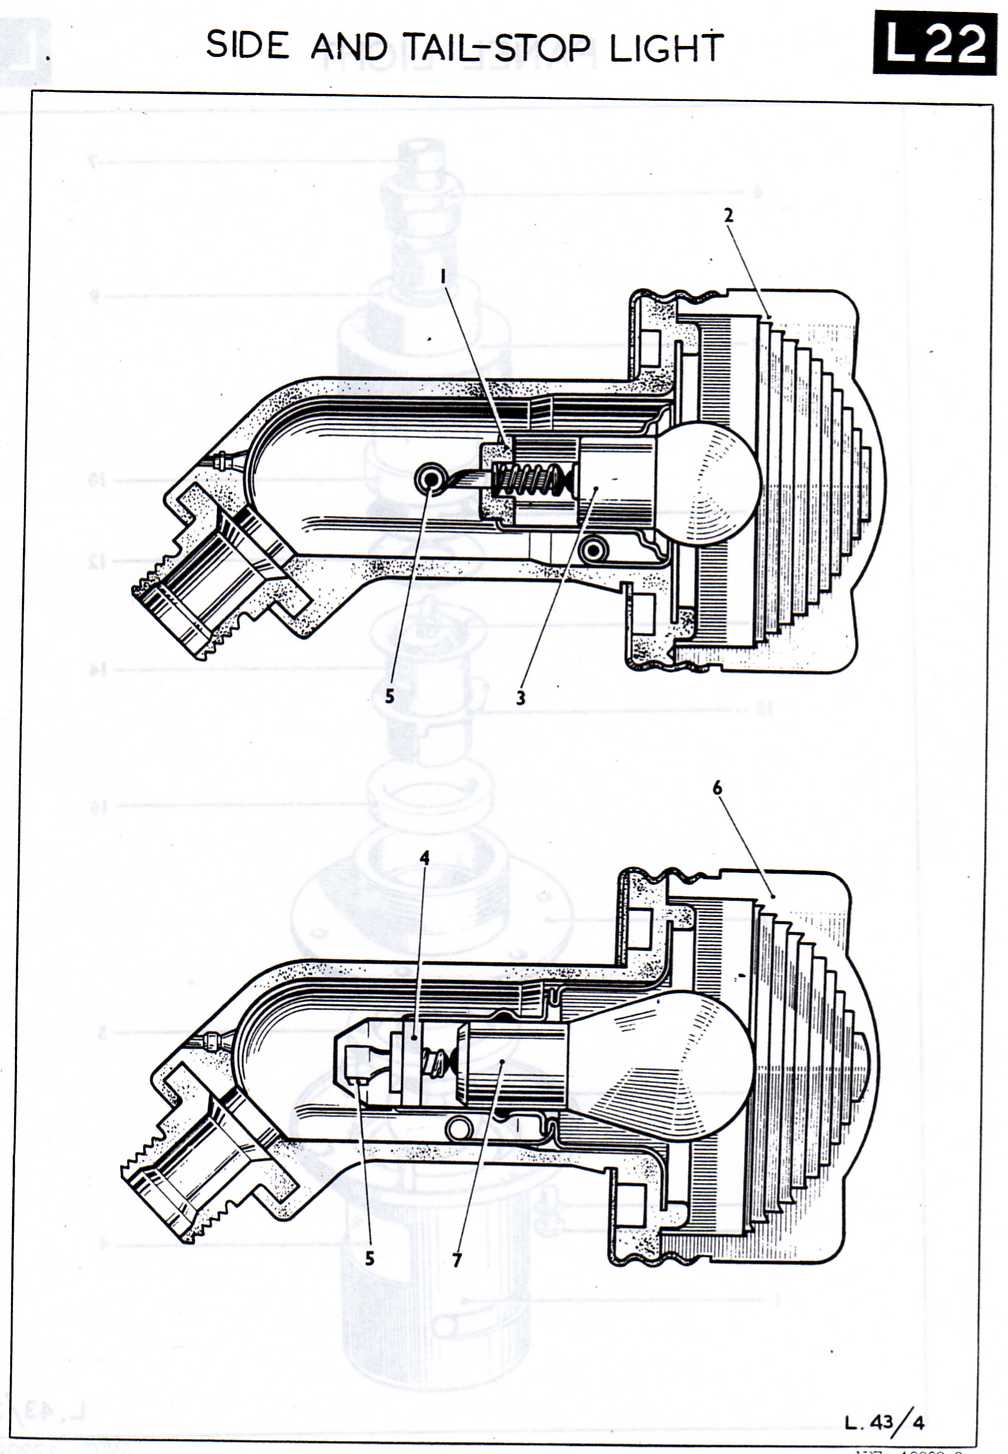
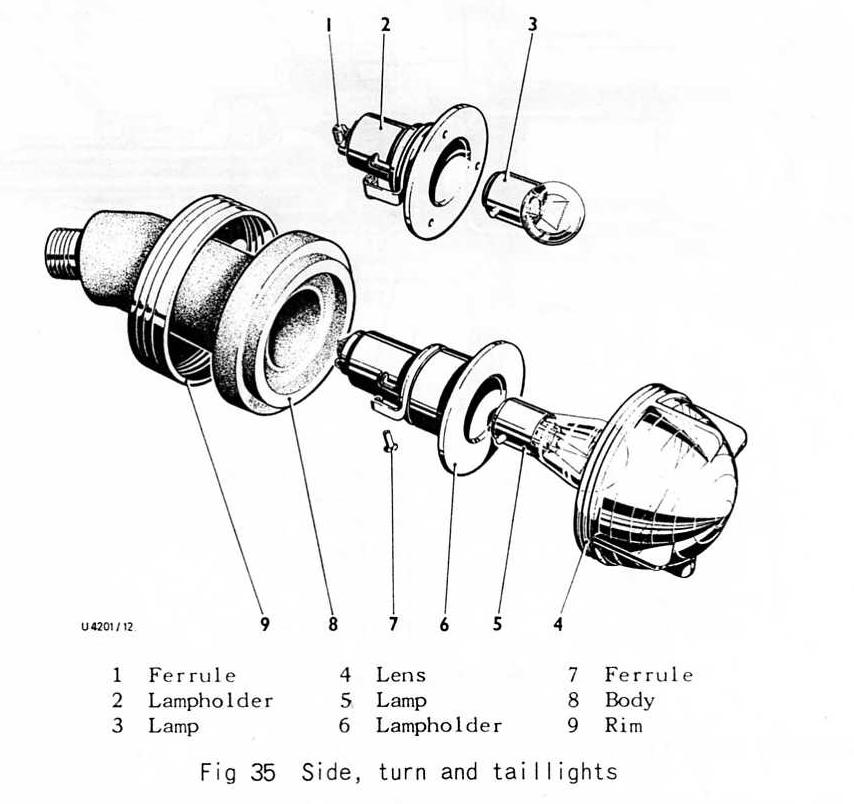
Tail Light - Side Light - Stop Light
Early side lights & stop lights to the left, later versions to the right.
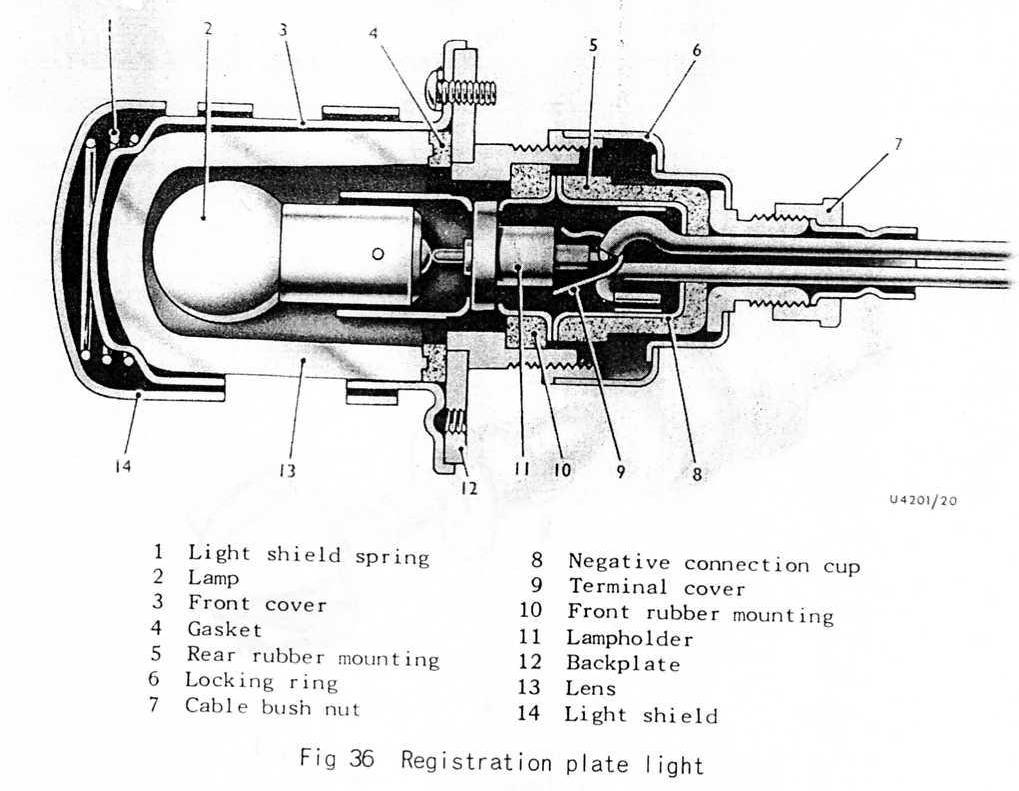
Number plate Light
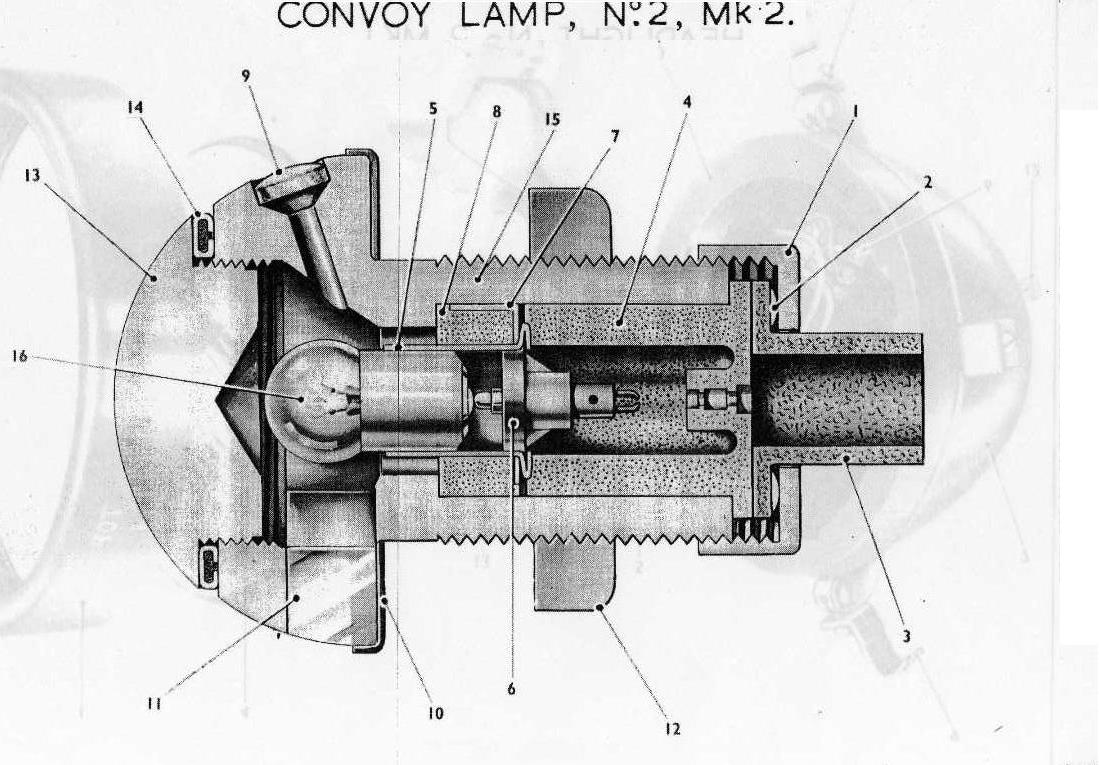
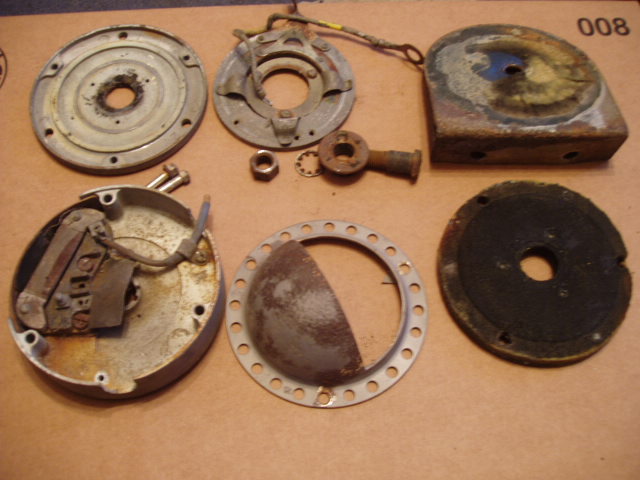
Convoy Light
Interior Lamp

Last updated on the 16/02/2015 22:08 Copyright © 2007 - 2015